

Customer + Transaction Events Configuration
This guide walks you through creating two Shopify Flow automations that send webhook-API events into Springbig to create Members and Transactions.
Automating Springbig Member & Transaction Sync Using Shopify Flow
Overview
This guide walks you through setting up Shopify Flow automations that seamlessly sync customers and transactions from Shopify into Springbig. By combining Shopify’s real-time commerce events with Springbig’s customer intelligence platform, merchants can unlock powerful segmentation, milestones, and automated messaging—without leaving the Shopify admin.
Using this integration, Shopify becomes the source of truth for customer and purchase activity, while Springbig becomes the engagement and loyalty engine.
What You'll Learn
By the end of this guide, you will know how to:
- Automatically create Springbig members when Shopify customers are created
- Send completed Shopify transactions to Springbig as Visits (sales)
- Ensure customers are properly identified using
pos_userandpos_type - Follow best practices to avoid visit errors and duplicate records
- Understand how these events power segmentation, milestones, and automation in Springbig
Why Use This Integration?
By syncing Shopify Flow events into Springbig, merchants can:
- Build rich customer profiles from Shopify data
- Power advanced segmentation using purchase behavior
- Trigger milestone-based and lifecycle automations
- Ensure accurate sales attribution inside Springbig
- Prepare the foundation for SMS, email, and loyalty engagement
Important: Submitting members and visits into Springbig may trigger automated messages. Be sure to review your Auto-connects before enabling these flows in production.
Before You Start
Requirements
- Shopify Flow is enabled in your Shopify Admin - This is an application available in the Shopify App Library.
- Shopify Flow Download Download Shopify Flow
- Acquire Springbig API credentials (AUTH-TOKEN)
- Reach out to your account manager for this Token.
Flow 1: Automatically Create Members in Springbig
Use Case
When a new customer is created in Shopify, automatically create (or upsert) that customer as a member in Springbig.
This ensures the customer exists in Springbig before any purchases or engagement events are recorded.
Step 1: Select the Trigger
Trigger: Customer created or updated
Step 2: Create a Flow
- Go to Shopify Admin → Apps → Flow
- Click Create workflow
Step 3: Shopify Flow > Send HTTP Request
This configuration is important to send data to springbig.
- Under the next Then, click the + → select Action
- Choose Flow → Send HTTP Request
-
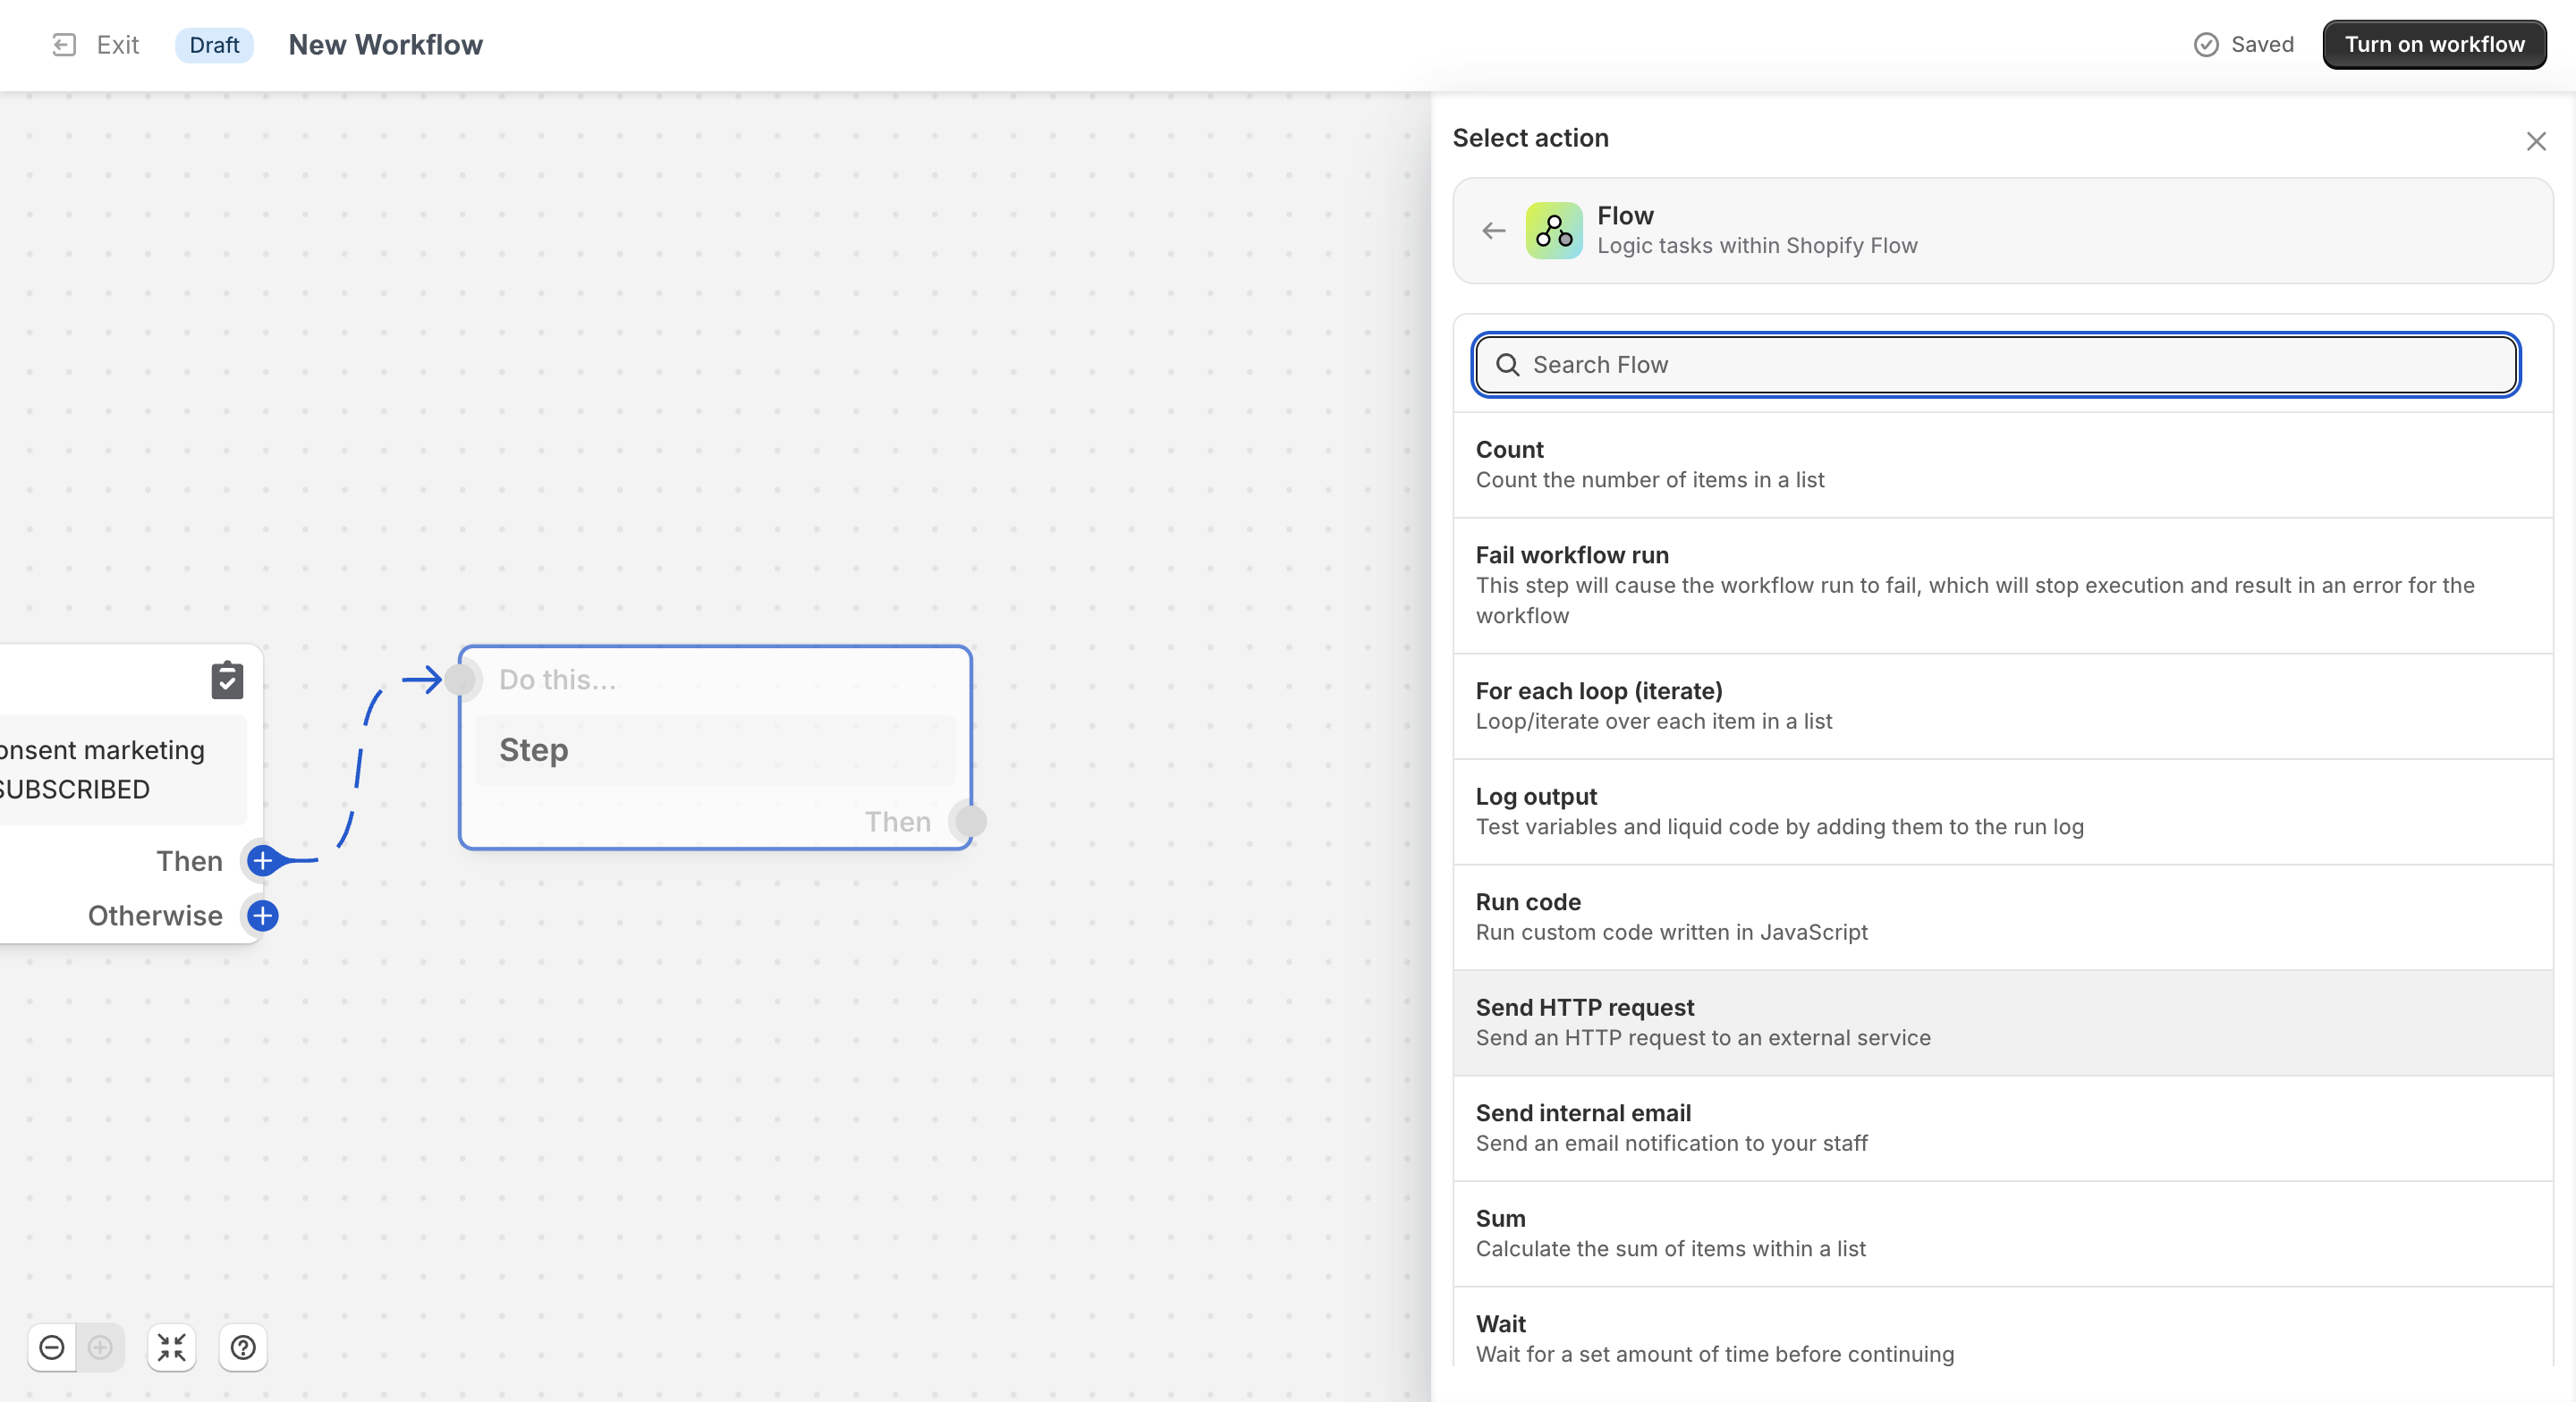
- If you have a cURL from your CSM, click Import cURL
- Or fill in the details manually as laid out in the next section HTTTP Request Configuration:
HTTP Request Configuration
- HTTP method:
POST - URL:
https://production.api.springbig.technology/pos/v1/members
Headers (Recommended: How to add secrets)
- Add a new header
auth-token- select add secret and choose auth token
- If you do not have a secret saved see the recommended section below
- Add a new header
x-api-key- select add secret and choose x-api-key
- If you do not have a secret saved see the recommended section below
- Add a new header
Content-Type- value:
application/json
- value:
It is very important that the headers have the exact syntax 'auth-token' and 'x-api-key'Also we highly recommend using secrets for the security of your account. please see section below
Body (JSON)
{
   "member":{
      "pos_type":"Shopify",
      "first_name":"{{customer.firstName}}",-> accepts string
      "last_name":"{{customer.lastName}}",-> accepts string
      "pos_user":"{{customer.id}}",-> accepts string
      "phone_number":"{{customer.defaultPhoneNumber.phoneNumber}}", -> accepts integer
      "email":"{{customer.defaultEmailAddress.emailAddress}}", -> accepts string
      "allowed_email":"{{customer.defaultEmailAddress.marketingOptInLevel}}", -> accepts boolean
      "allowed_sms":"{{RANGES_ACCROSS_PLATFORMS}}" -> accepts boolean
   }
}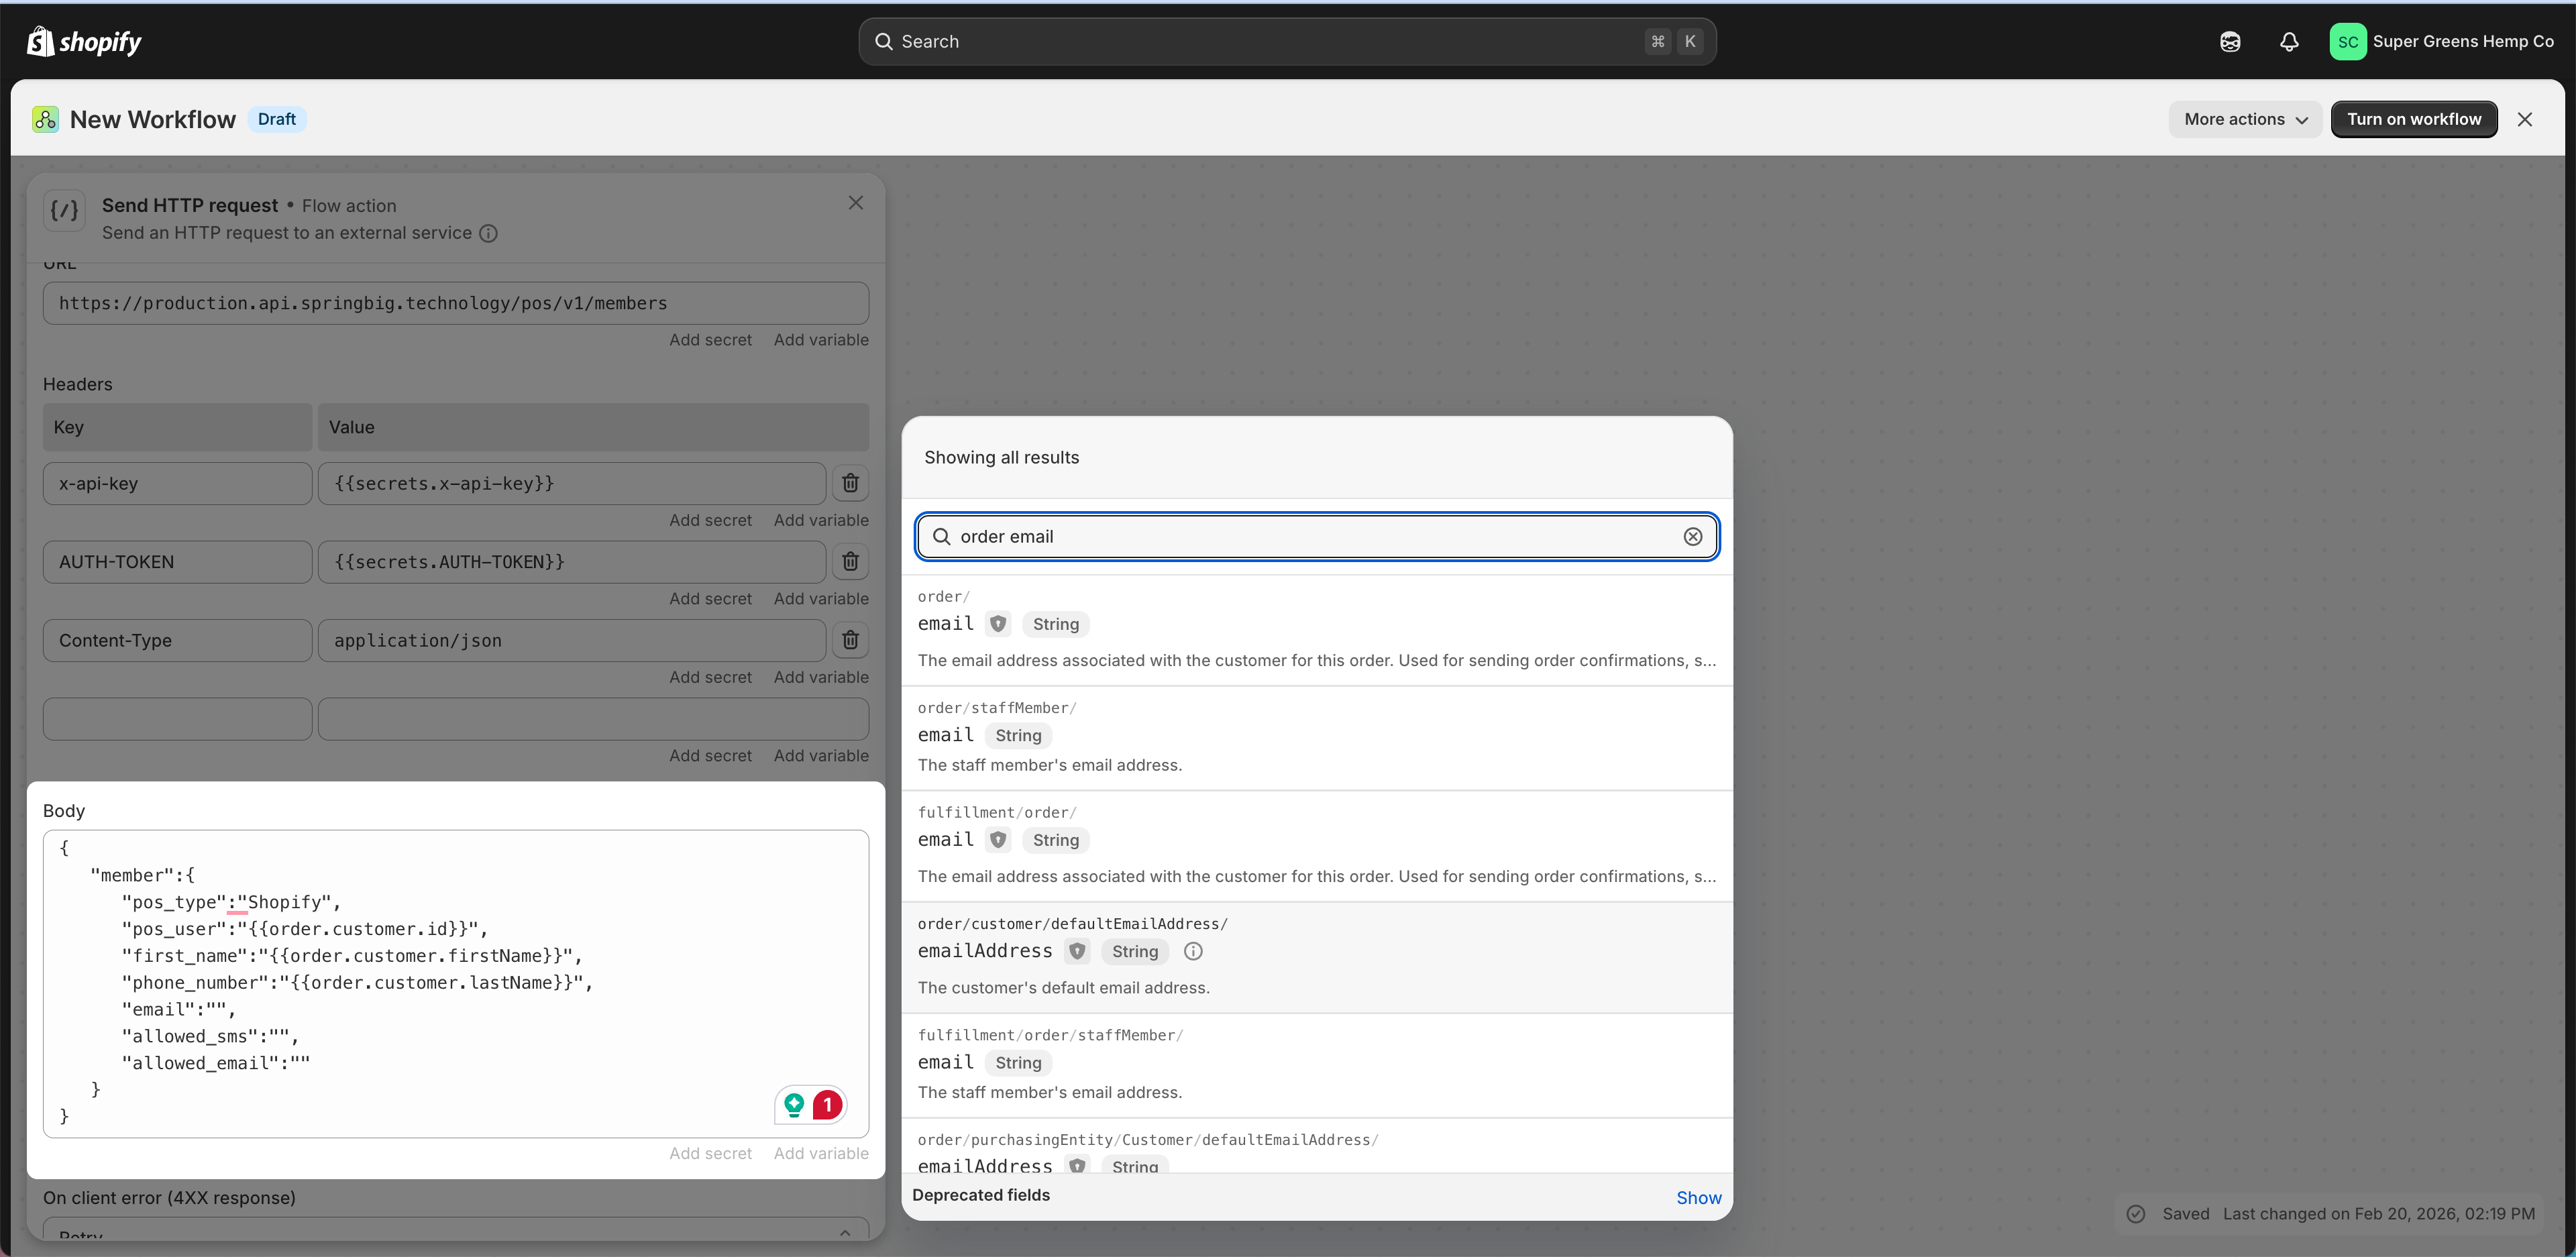
This is just an example payload. Your ID's and Shopify Liquid variables will vary based on your use case. Please ensure that you map out the variables accordingly.
{
   "member":{
      "pos_type":"Shopify",
      "first_name":"{{order.customer.firstName}}",
      "last_name":"{{order.customer.lastName}}",
      "pos_user":"{{order.customer.id}}",
      "phone_number":"{{order.phone}}",
      "email":"{{order.email}}",
      "allowed_email":"{{order.customerAcceptsMarketing}}"
   }
}
Required Springbig Member Attributes
Every member sent to Springbig must include:
pos_user– The customer’s Shopify Customer IDpos_type– Always set to"Shopify"
These fields allow Springbig to correctly identify and match Shopify customers.
Recommended but Optional
- phone_number
- first_name
- allowed_email: the member's preferred compliance selection for receiving emails (accepts true or false)
Flow 2: Automatically Record Transactions as Visits
Use Case
When an Order is Fulfilled in Shopify, send the transaction to Springbig as a Visit.
Visits are used for:
- Purchase-based segmentation
- Customer milestones
- Lifetime value calculations
- Automated messaging triggers
Important RequirementThe customer must already exist in Springbig before a visit can be recorded.
Include a Member Flow along with a Visit Flow
Step 1: Select the Trigger
Recommended trigger:
- Order Fulfilled
Alternative triggers (based on business logic):
- Checkout completed
- Order fulfilled
Step 2: Create the Workflow
- Go to Shopify Admin → Apps → Flow
- Click Create workflow
Step 3: Shopify Flow > Send HTTP Request
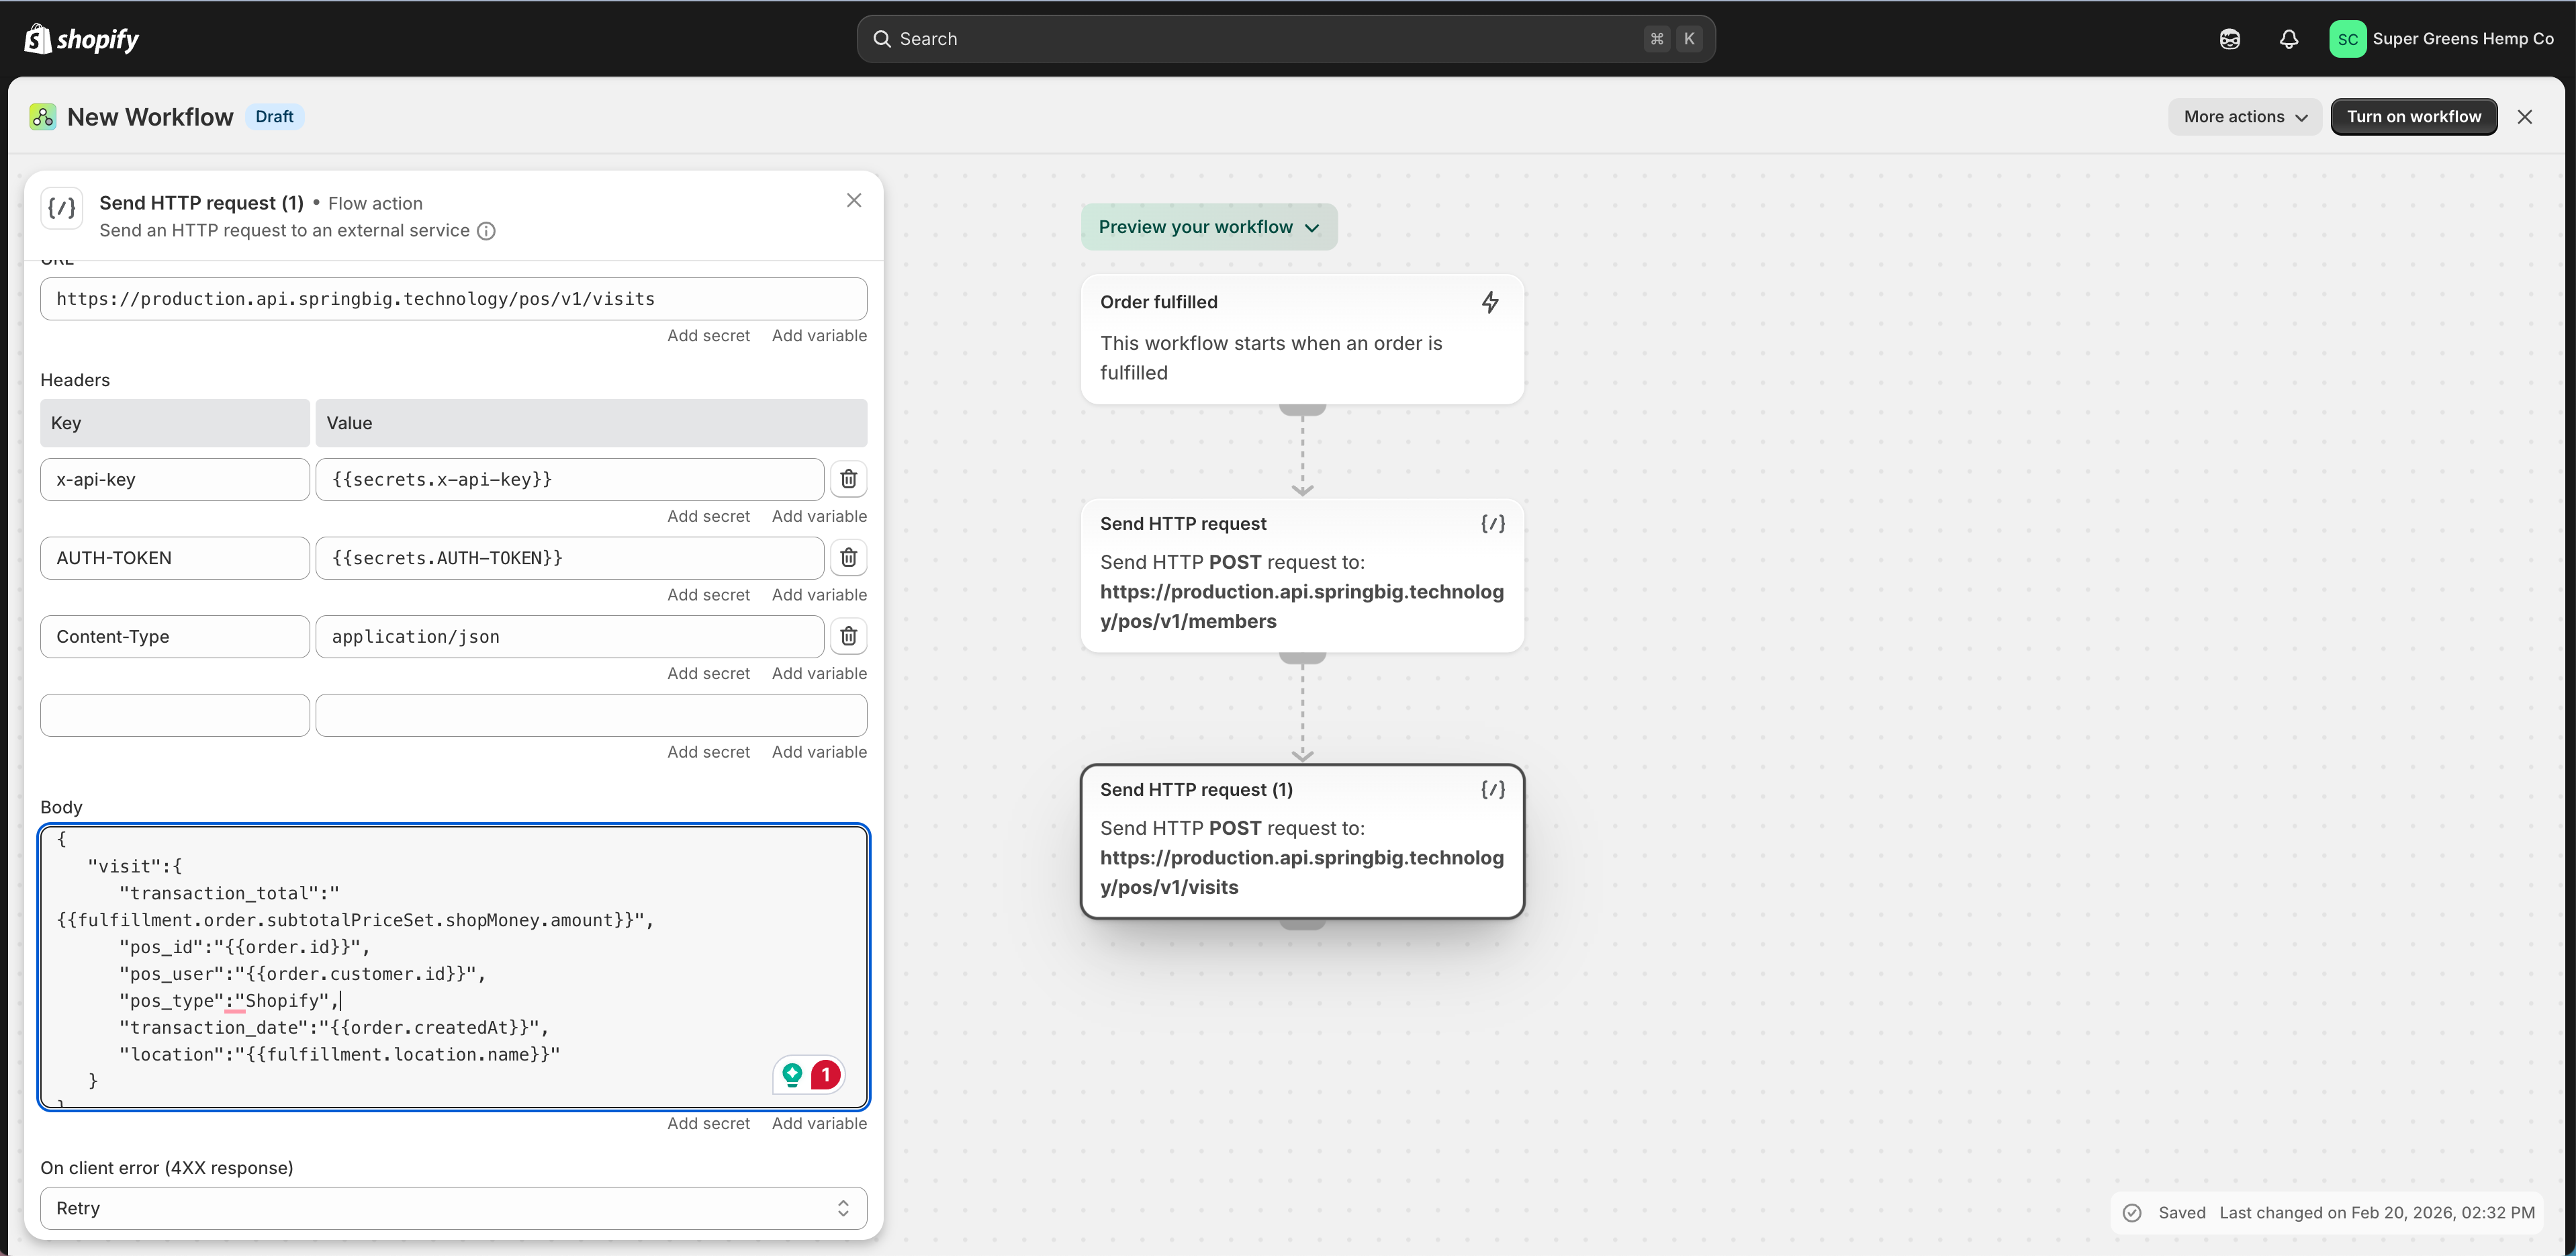
This Flow ill include two actions:
- Create Member
- Create Visit
Create Member
We will begin by trigger an action to create the member once the Order is fulfilled
HTTP Request Configuration
- HTTP method:
POST - URL:
https://production.api.springbig.technology/pos/v1/members
Headers (Recommended: How to add secrets)
- Add a new header
auth-token- select add secret and choose auth token
- If you do not have a secret saved see the recommended section below
- Add a new header
x-api-key- select add secret and choose x-api-key
- If you do not have a secret saved see the recommended section below
- Add a new header
Content-Type- value:
application/json
- value:
{
   "member":{
      "pos_type":"Shopify",
      "first_name":"{{order.customer.firstName}}",
      "last_name":"{{order.customer.lastName}}",
      "pos_user":"{{order.customer.id}}",
      "phone_number":"{{order.phone}}",
      "email":"{{order.email}}",
      "allowed_email":"{{order.customerAcceptsMarketing}}"
   }
}
Create Visit
This configuration is important to send data to springbig.
- Under the next Then, click the + → select Action
- Choose Flow → Send HTTP Request
HTTP Request Configuration
- HTTP method:
POST - URL:
https://production.api.springbig.technology/pos/v1/visits
Headers (Recommended: How to add secrets)
- Add a new header
auth-token- select add secret and choose auth token
- If you do not have a secret saved see the recommended section below
- Add a new header
x-api-key- select add secret and choose x-api-key
- If you do not have a secret saved see the recommended section below
- Add a new header
Content-Type- value:
application/json
- value:
It is very important that the headers have the exact syntax 'auth-token' and 'x-api-key'Also we highly recommend using secrets for the security of your account. please see section below
Body (JSON)
This is just an example payload. Your ID's and Shopify Liquid variables will vary based on your use case. Please ensure that you map out the variables accordingly.
{
   "visit":{
      "transaction_total":"{{fulfillment.order.subtotalPriceSet.shopMoney.amount}}",
      "pos_id":"{{order.id}}",
      "pos_user":"{{order.customer.id}}",
      "pos_type":"Shopify",
      "transaction_date":"{{order.createdAt}}",
      "location":"{{fulfillment.location.name}}"
   }
}
Required Springbig Member Attributes
Every member sent to Springbig must include:
pos_user– The customer’s Shopify Customer IDpos_type– Always set to"Shopify"pos_id- The Shopify Transaction ID
Recommended but Optional
See the Full API call recorded here
Automation & Messaging Considerations
Submitting members and visits into Springbig may automatically trigger:
- Welcome messages
- Post-purchase SMS or email
- Milestone campaigns
Best Practice
- Review all Auto-connects and automation rules before enabling these flows.
Testing Checklist
- Create a test customer in Shopify
- Confirm the member appears in Springbig with correct pos_user and pos_type
- Place a test order
- Confirm a Visit record is created in Springbig
- Validate totals, items, and timestamps
- Confirm automated messages behave as expected
Updated 7 months ago