

User Signups to Springbig
What You'll Learn
- Create a Klaviyo Flow that syncs list members with Springbig
- Configure a webhook in Klaviyo to send subscriber data to Springbig
- Use dynamic fields (email, phone, name, address, consent) for personalization
- Activate the flow so new list members are automatically synced to Springbig
Why is this required
- Members must be enrolled in Springbig before they can receive campaigns.
- If subscribers aren’t synced from Klaviyo to Springbig, messages cannot be delivered.
🛠 Setup Klaviyo Flow for List Sync
Step 1: Access Flows
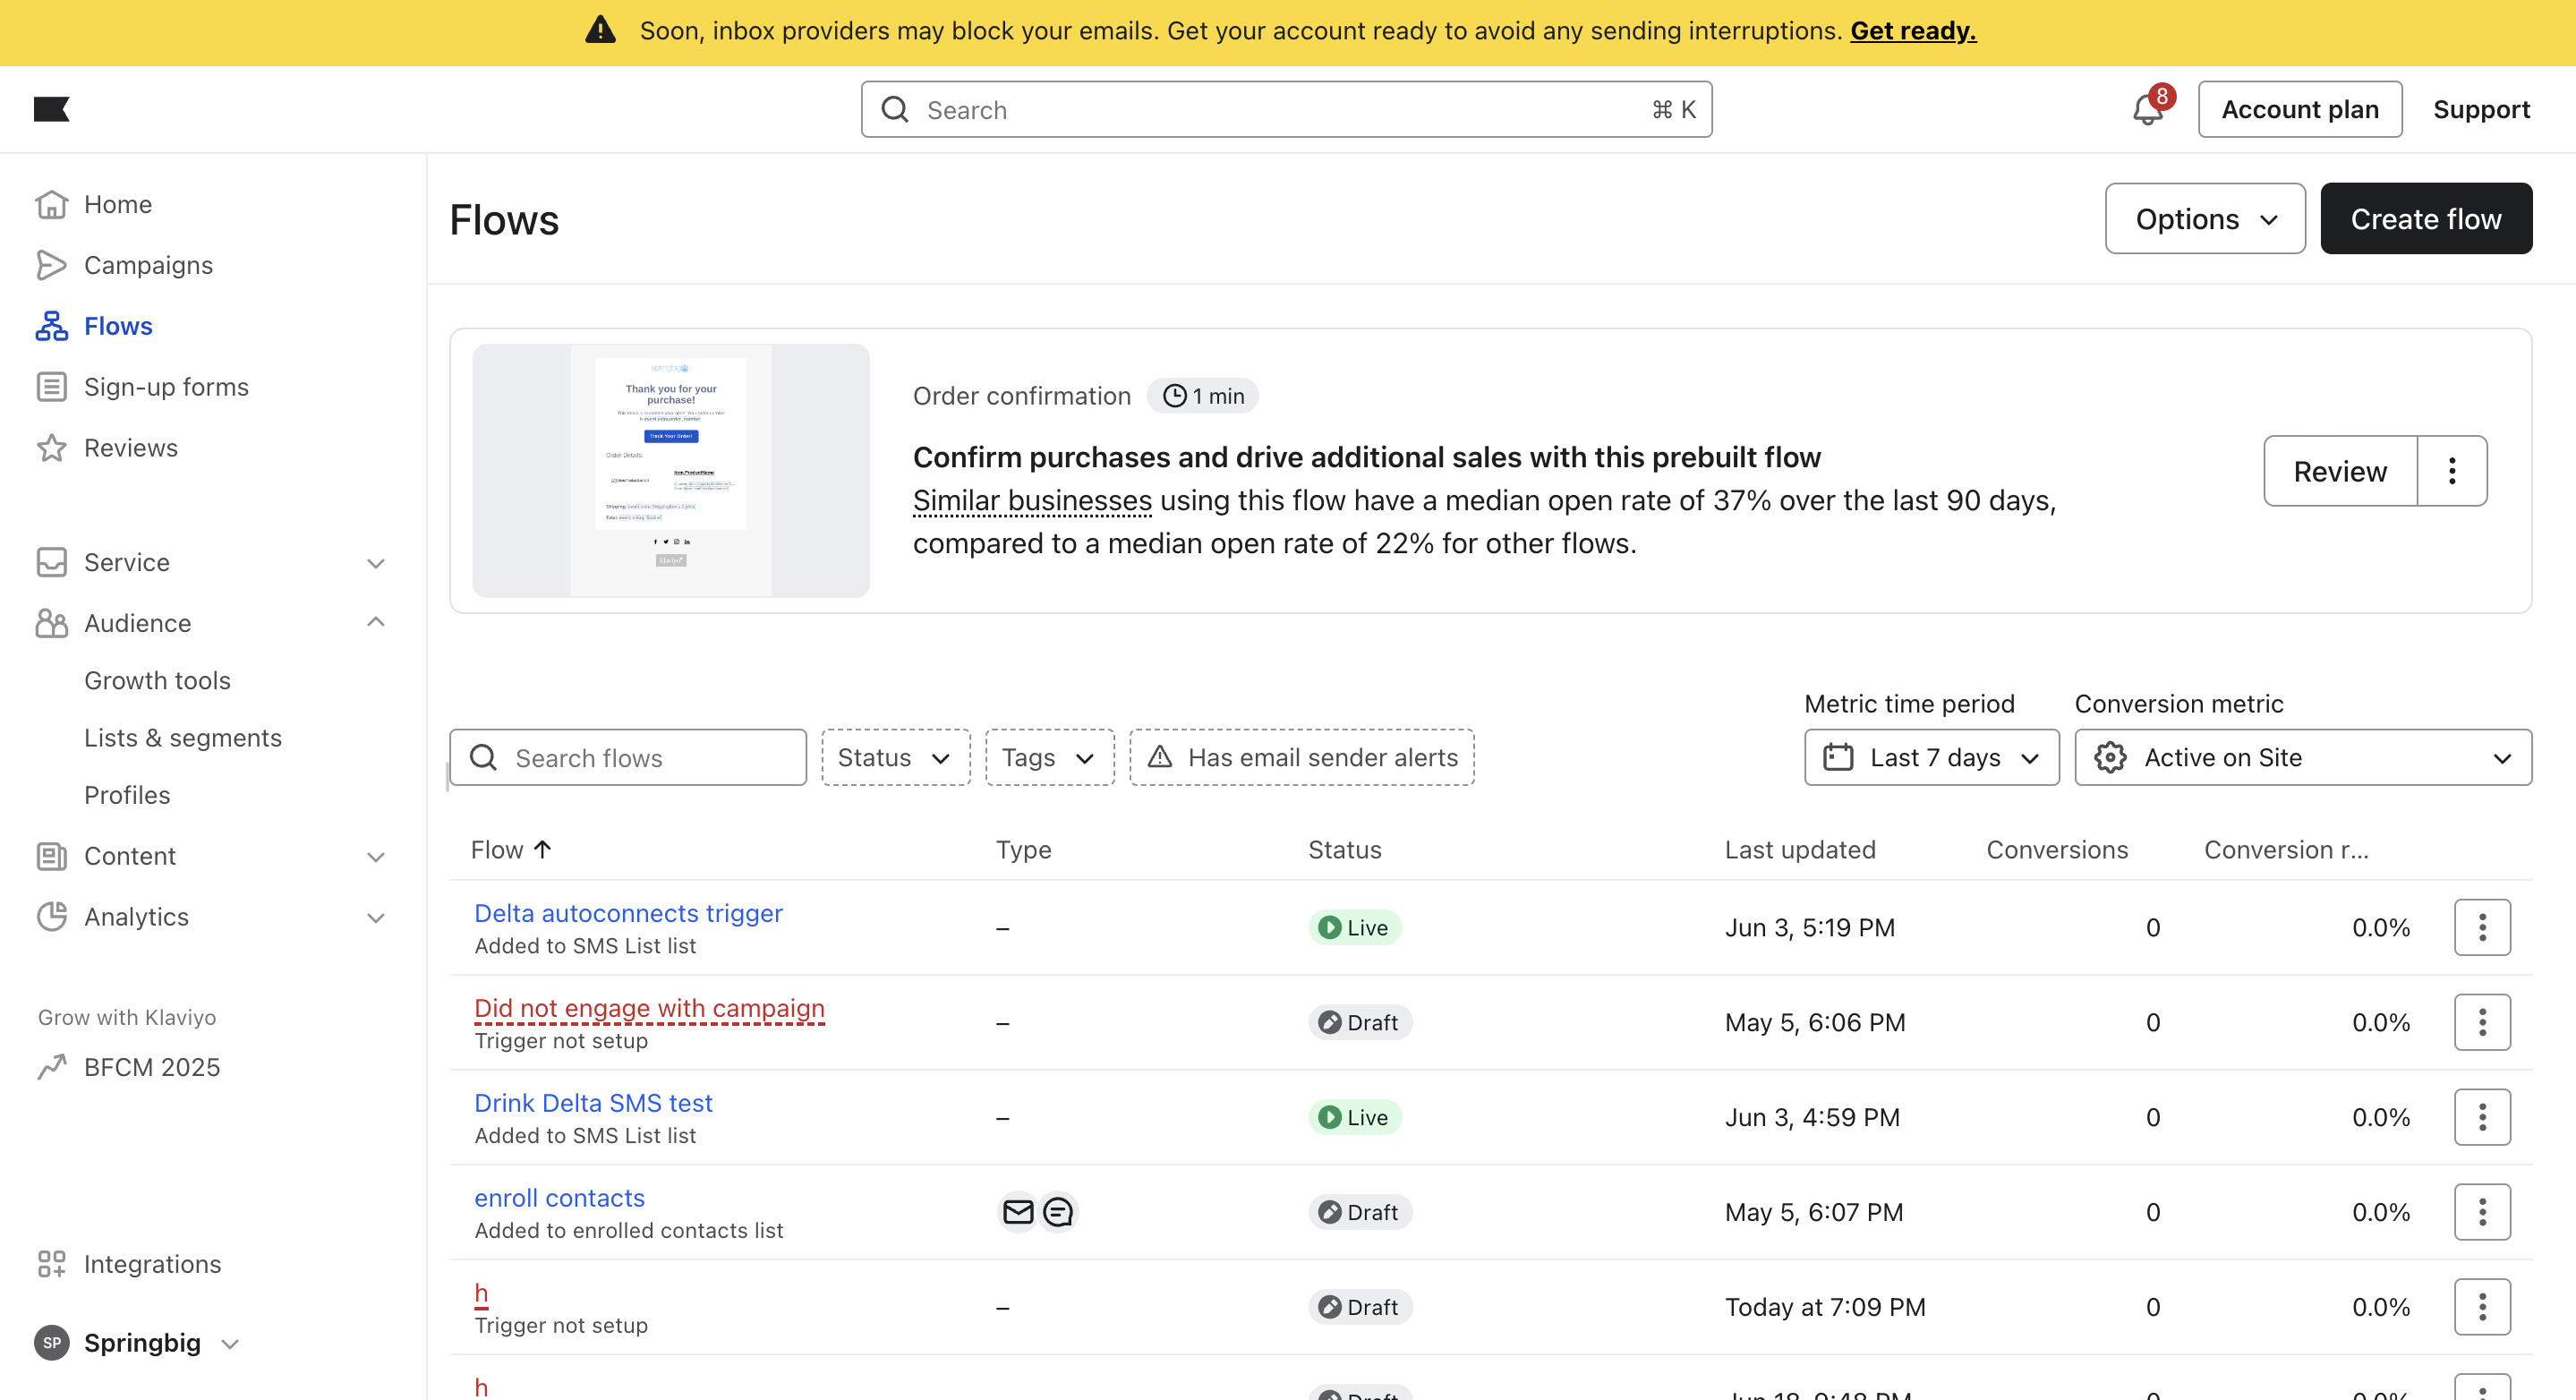
- From your Klaviyo dashboard, click Flows in the left-hand menu.
- Click Create Flow in the top-right corner.
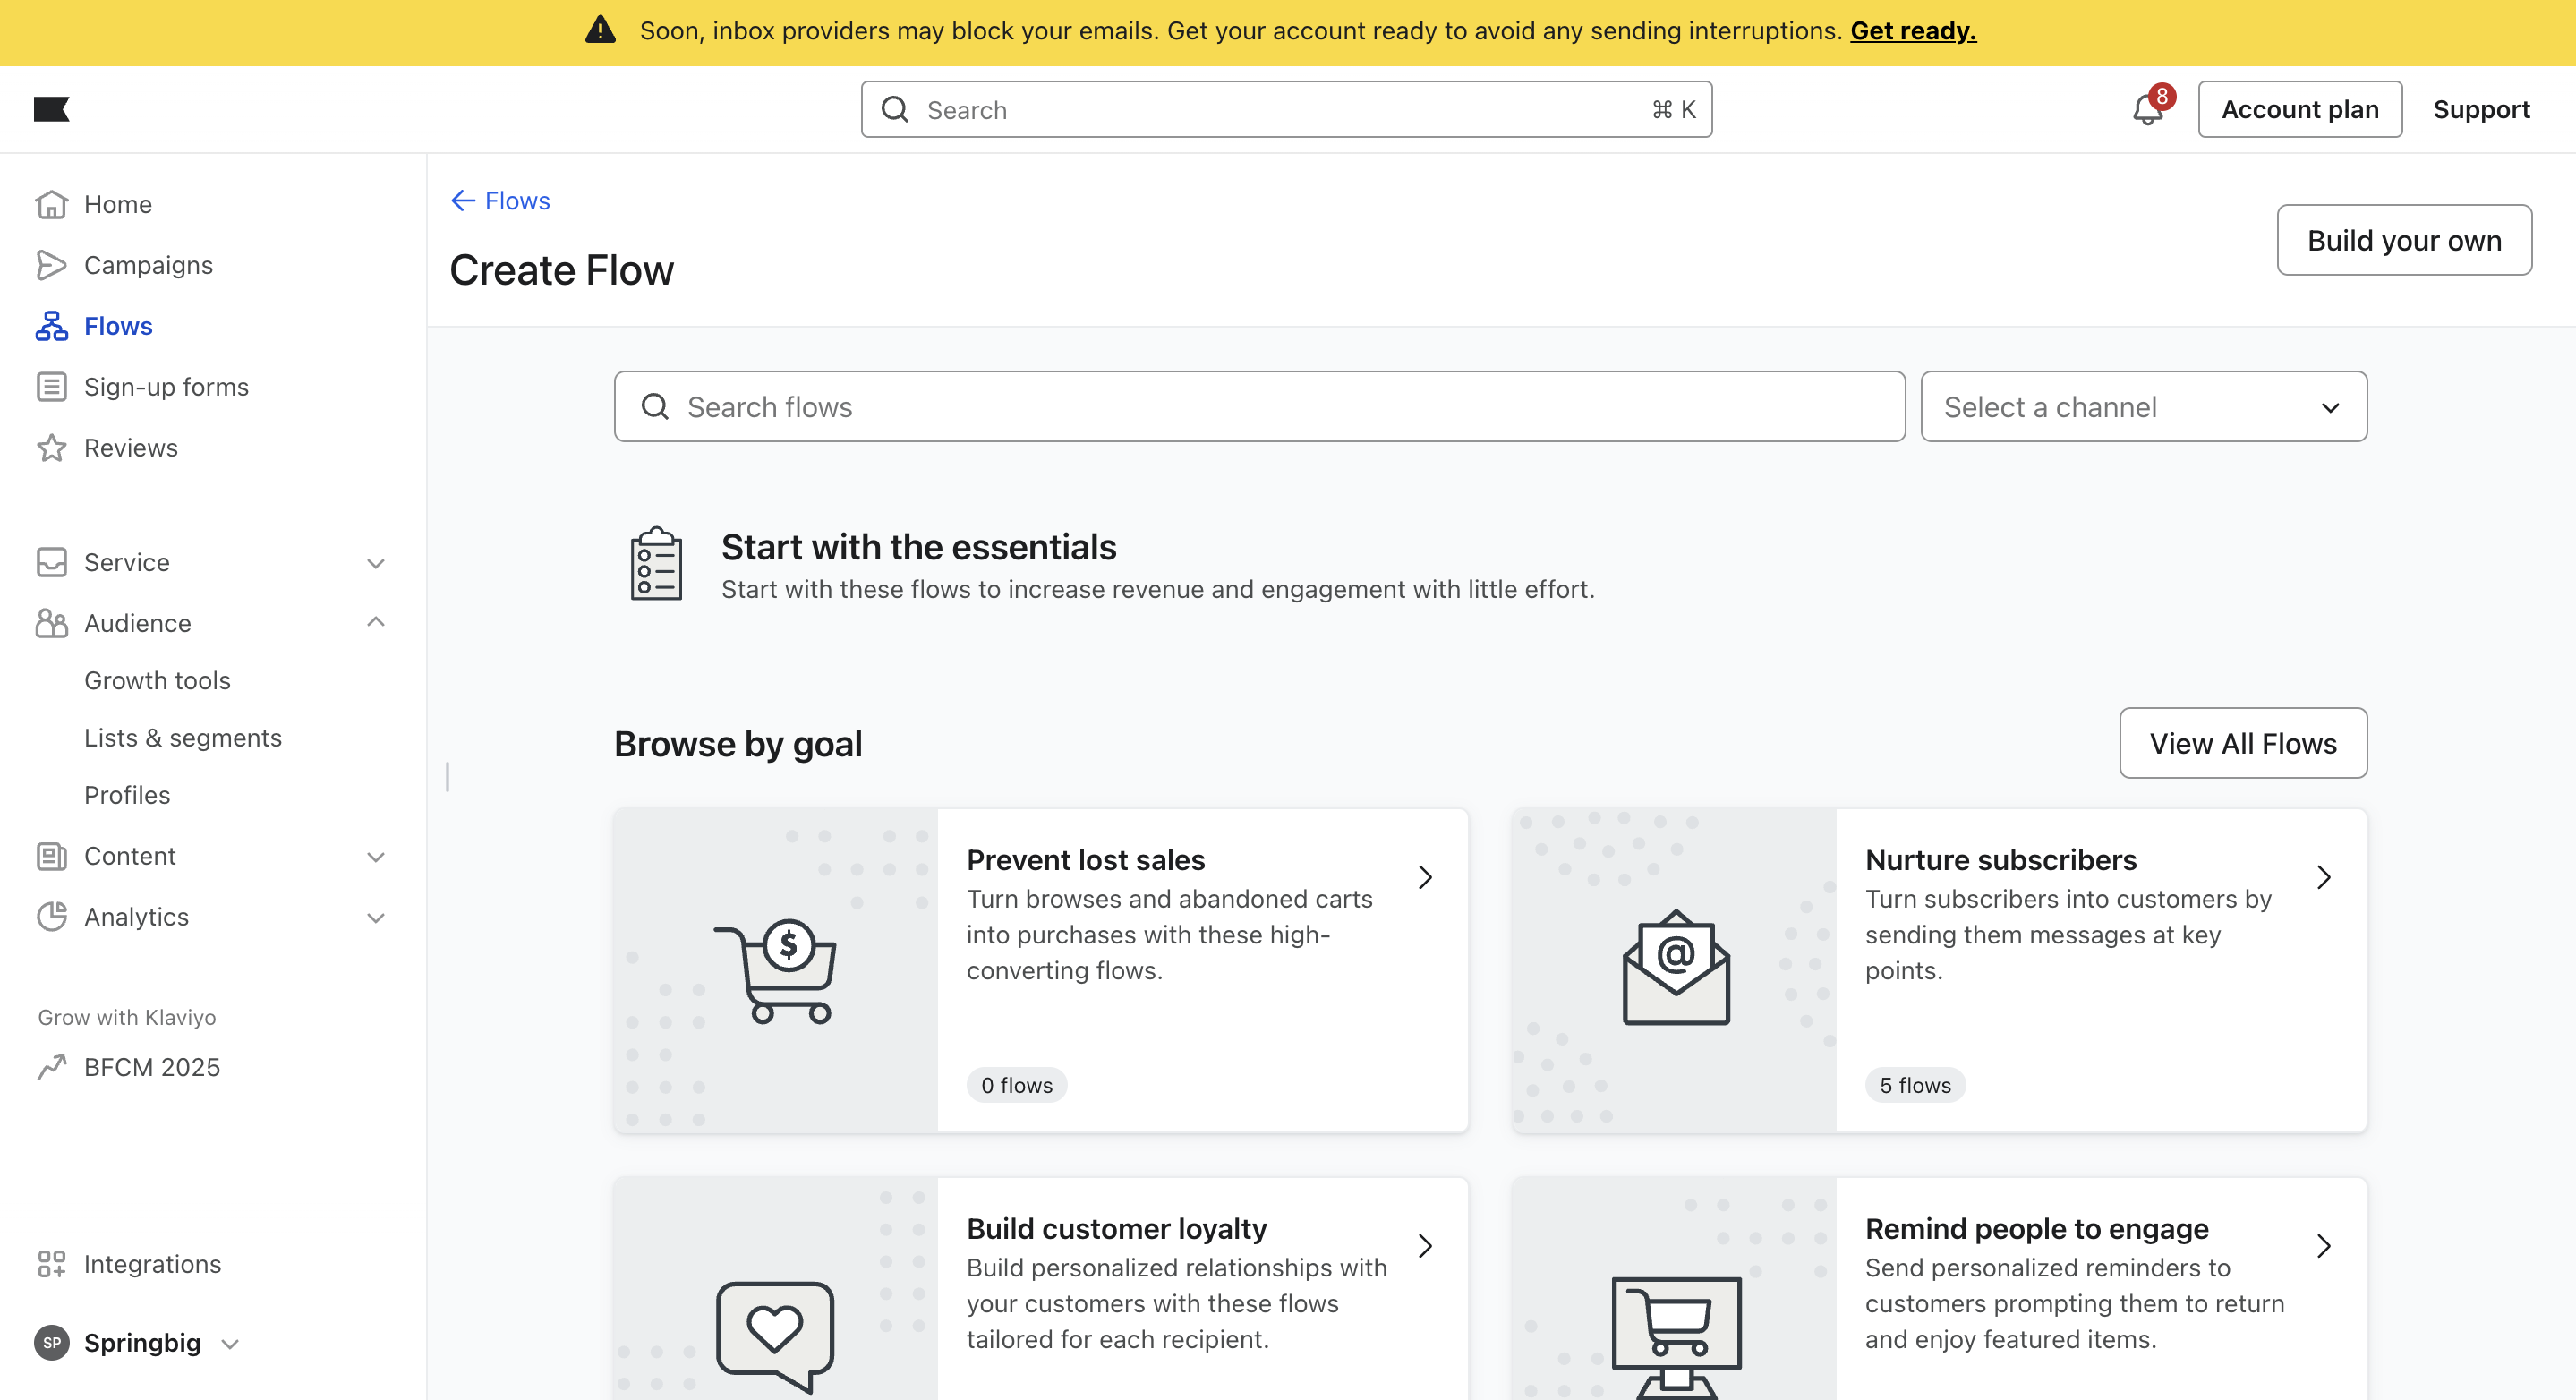
- Click Build your own
Step 2: Name your Flow
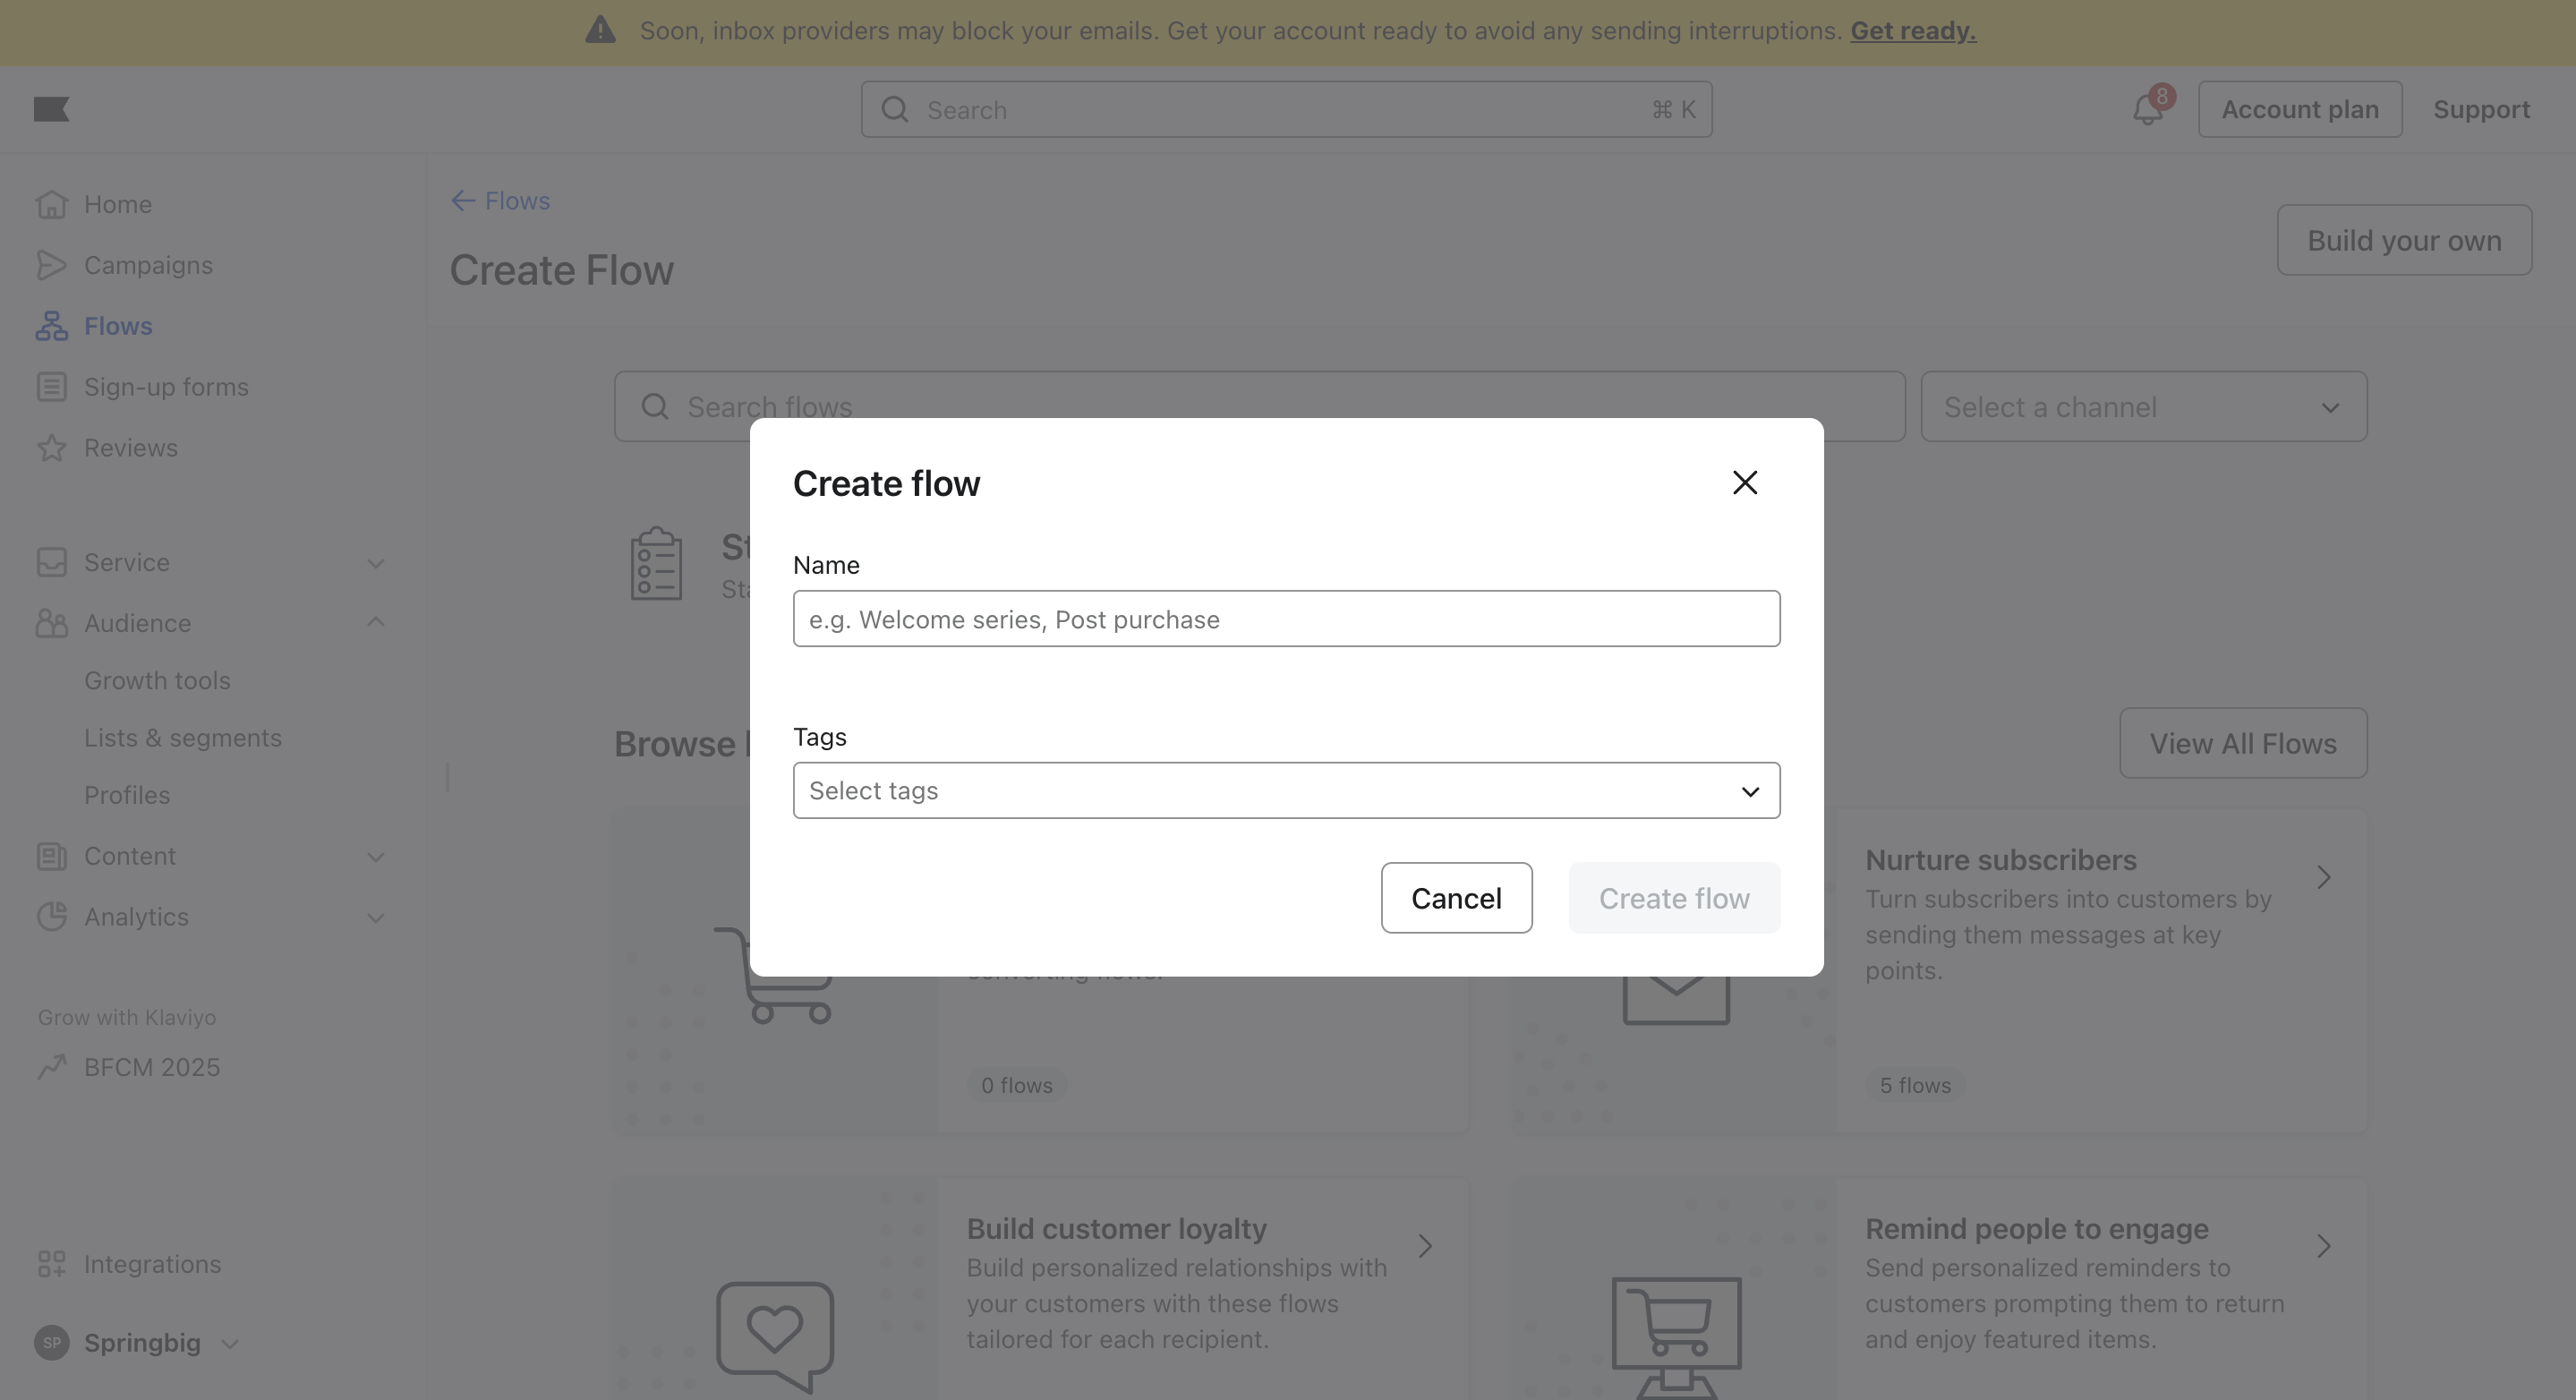
-
Enter a descriptive flow name, for example:
{{Your List Name}} + Springbig Webhook
Use a name that reflects the specific Klaviyo list and purpose, so it’s clear this flow syncs that list to Springbig.
Step 3: Set the Trigger
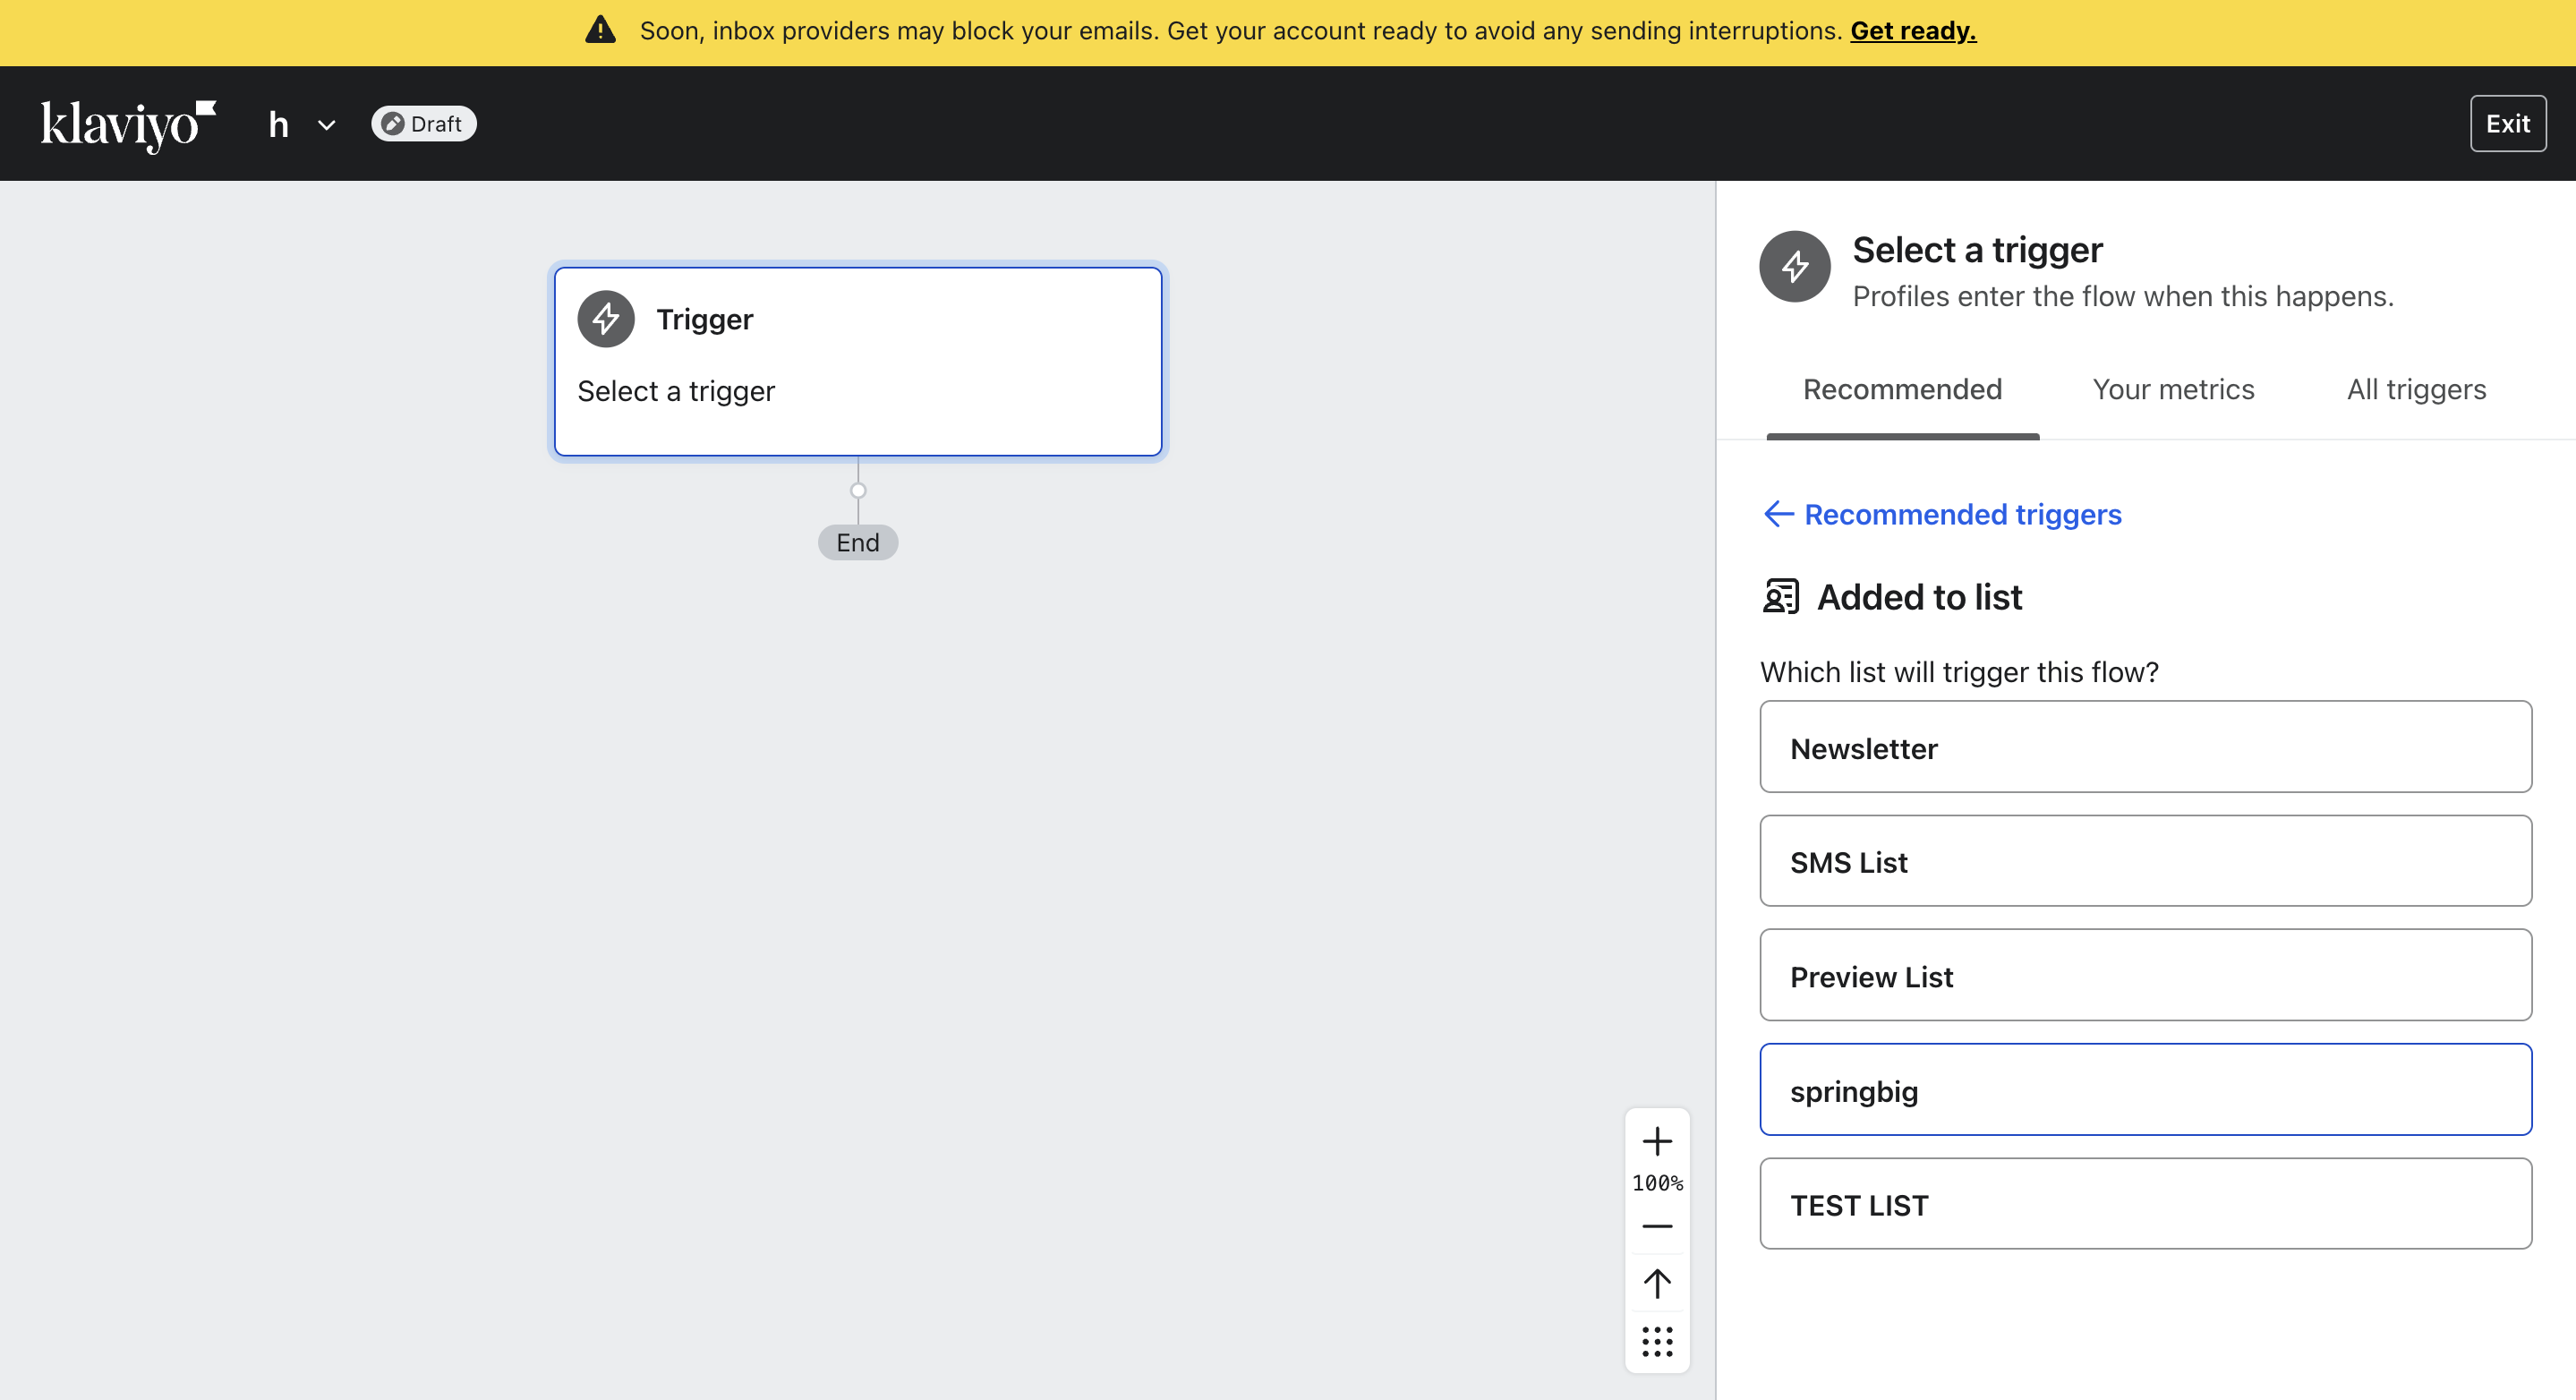
- In Trigger Setup, select List.
- Choose the Klaviyo list you want to sync with Springbig.
- Click Done.
You must repeat this entire setup for each Klaviyo list you want to sync with Springbig.
Step 4: Add and Configure the Webhook
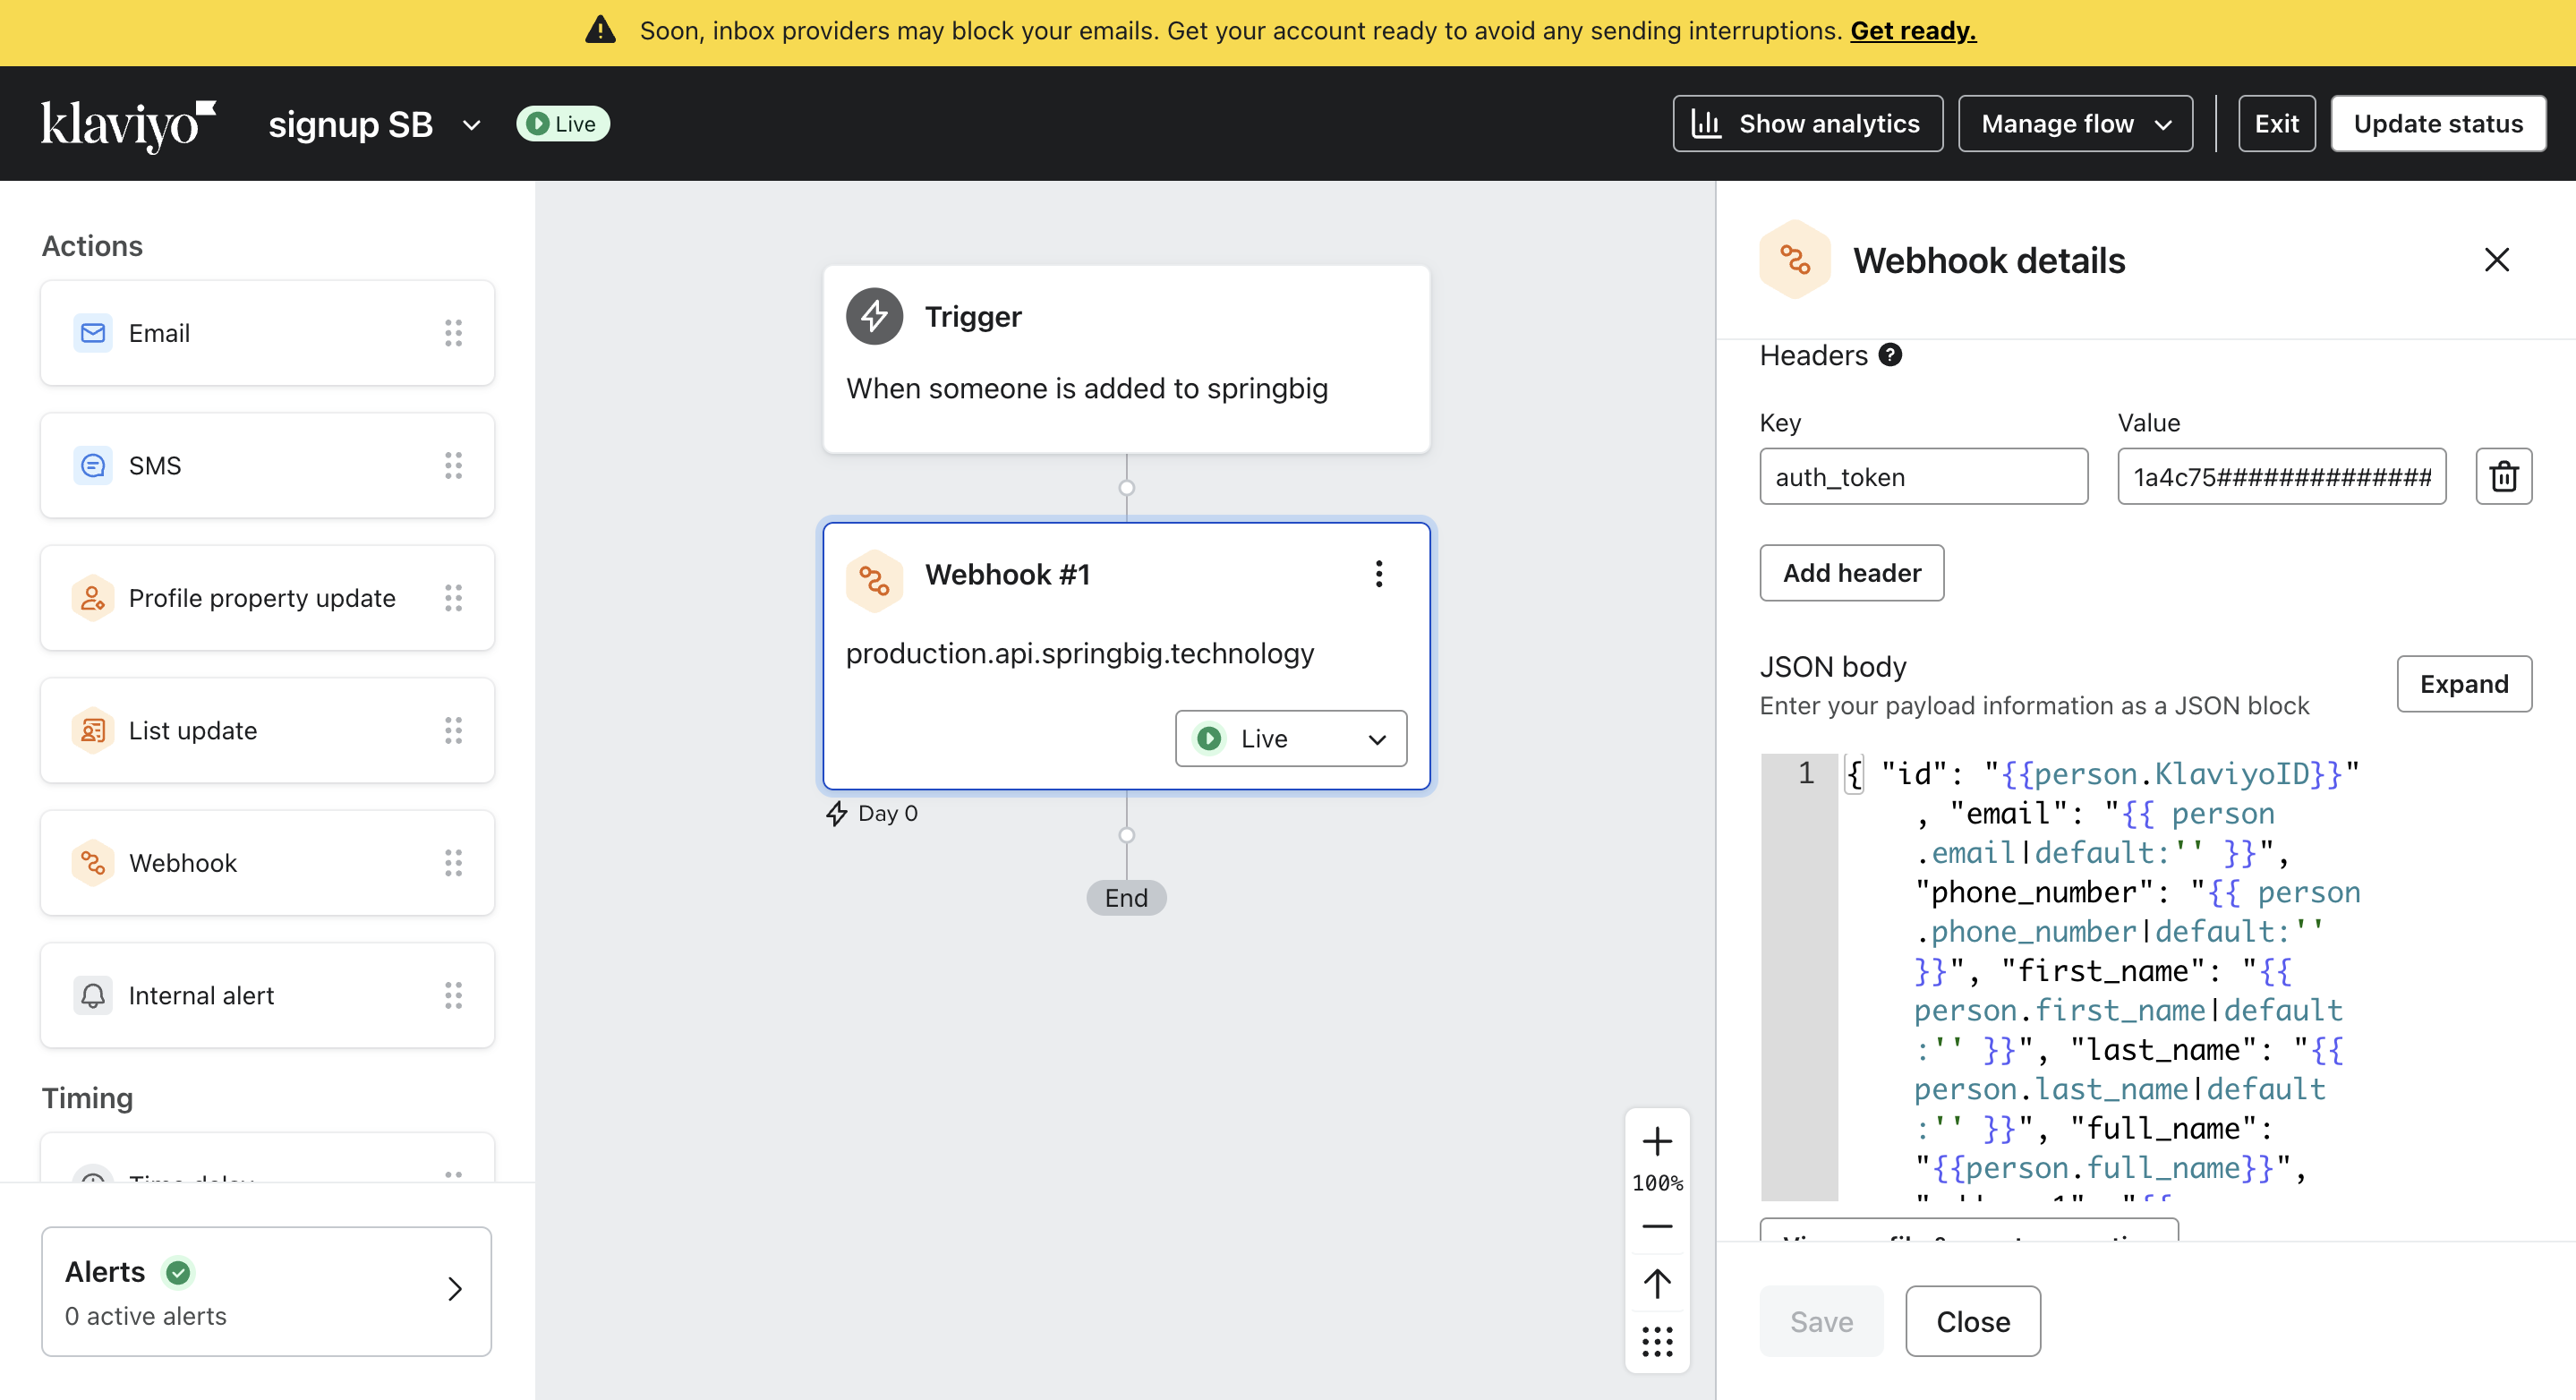
- In the flow builder, drag and drop a Webhook into the flow.
If you see an error when adding a webhook, enable Two-Step Authentication in your Klaviyo account settings and try again.
- Configure the webhook with the following:
- Method:
POST - Destination URL:
https://production.api.springbig.technology/callbacks/v1/klaviyo - Headers:
auth-token: Use the auth token provided by your Springbig CSMContent-Type:application/json
- JSON Body: Paste the following payload:
{
  "id": "{{ person.KlaviyoID }}",
  "email": "{{ person.email|default:'' }}",
  "phone_number": "{{ person.phone_number|default:'' }}",
  "first_name": "{{ person.first_name|default:'' }}",
  "last_name": "{{ person.last_name|default:'' }}",
  "full_name": "{{ person.full_name }}",
  "address1": "{{ person|lookup:'$address1'|default:'' }}",
  "address2": "{{ person|lookup:'$address2'|default:'' }}",
  "city": "{{ person.City|default:'' }}",
  "region": "{{ person.Region|default:'' }}",
  "country": "{{ person.Country|default:'' }}",
  "zip": "{{ person.Zipcode|default:'' }}",
  "consent": "{{ person|lookup:'$consent'|default:'' }}"
}
Step 5: Activate the Flow
- Click Update Action Statuses (top-right).
- In Action Status, select Live.
- Click Save (bottom-left).
Your Klaviyo Flow is now live! When a subscriber is added to the selected list, their data will automatically sync to Springbig.
📘 Parameters Reference
| Field | Type | Description |
|---|---|---|
id | string | Klaviyo ID of the subscriber |
email | string | Subscriber’s email address (if available) |
phone_number | string | Subscriber’s phone number (if available) |
first_name | string | Subscriber’s first name |
last_name | string | Subscriber’s last name |
full_name | string | Full name as captured in Klaviyo |
address1 | string | Address line 1 |
address2 | string | Address line 2 |
city | string | City |
region | string | Region or state |
country | string | Country |
zip | string | Postal or ZIP code |
consent | string | SMS consent value as mapped in Klaviyo (from $consent lookup) |
Updated 11 months ago
Did this page help you?